project-image

PinBox by Hamm Camera Company: A DIY Pinhole Camera

Created by Robert Hamm

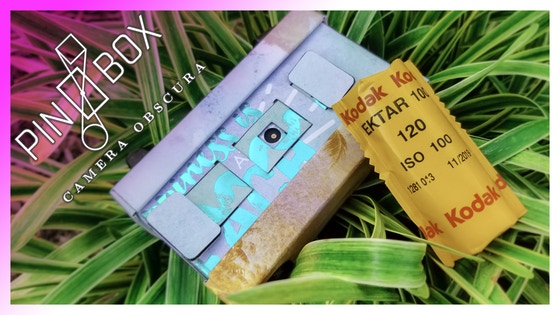
Meet PinBox. A Do-It-Yourself pinhole camera by Hamm Camera Company. PinBox is a 120 format 6x6 film camera built around a simple prototyping platform. We designed PinBox with the DIY community in mind. Our goal is to provide a great pinhole camera that teaches the fundamentals of pinhole camera design and teaches you how to make your own cameras by making ours!

Latest Updates from Our Project:

Backer Surveys will be sent out soon.
over 5 years ago – Tue, Aug 21, 2018 at 11:55:33 PM

Hello lovely people,

PinBox backer surveys are ready to be sent out. Please be on the look out for the survey over the next couple of days. I am sending out a small number of surveys to make sure that the survey system is working correctly. The main body of surveys will go out in the by the 23rd of August.

If you have any questions please submit them here.

PinBox is scheduled to ship at the end of the August. There is a high demand for the complete aperture set. I have a limited amount of complete sets on hand with more on the way. Please complete your survey upon receipt. This will help me ship to you faster. 

Cheers!

Rob

PinBox design files and guide.
over 5 years ago – Tue, Aug 21, 2018 at 10:02:47 PM

This post is for backers only. Please visit Kickstarter.com and log in to read.

Choosing your PinBox pinhole aperture.
over 5 years ago – Wed, Aug 08, 2018 at 01:48:51 PM

Hello Lovely People!

Let's talk about choosing an aperture for PinBox. I am very pleased to announce that as part of the campaign promise YOU will have the choice of your favorite pinhole. This is very important because it's hard to come by quality precision pinholes without spending a mint (at least in the USA). For example, a laser drilled pinhole can cost upwards of $30 each from Thor Labs, and that doesn't include shipping. 

Let's talk about pinhole construction. 

There are many ways to make a pinhole. The more accurate and precise, the better the image the pinhole will produce. 

  • Most people are familiar with home-made pinholes. This involves using a piece of metal, poking a hole through it with a sewing needle, and then sanding the metal flat and smooth. This provides a very poor pinhole. Consider this a "creative" or "artistic" pinhole. This is not how PinBox pinholes are made.
  • Stepping up from aluminum cans and sewing needles one will discover micro drill sets. These super small drill bits have the ability to drill very small pinholes, much smaller than a needle, but nowhere near as small as a laser or acid etching. They are a big step up from a needle, but produce burrs on the substrate, require a lot of set up, and the tools aren't something that most people would have lying around. If you were to buy a micro drill set you would typically spend more on the set than a retail pinhole. This is not how PinBox pinholes are made.
  • Moving up the ladder once again one will discover laser drilling. Lasers have the ability to drill very precise pinholes at extremely small apertures. This is a good choice for scientific and industrial applications. However, with lasers, there is a draw back as well. Lasers are light and as such, aligning the laser to the substrate for drilling is a very complicated process. Also, even with the most advanced lasers, some parts of the beam can be slightly more intense than others, and therefore create a slightly distorted pinhole. I considered laser drilling but decided that for PinBox, I wanted something else. 
  • All pinholes for PinBox are precision acid etched on stainless steel, Generally 302 B, but sometimes others. The acid etching process insures that the pinhole is perfectly round. This is because surface tension on the acid micro drop pulls the edges into a circle. Once it eats through the metal to the other side It drops off due to a very slight negative pressure air flow. The remaining disk is a perfect pinhole that has no burrs on the pinhole edges and is ready for use. This method also allows for much smaller apertures than others. This is the method chosen for PinBox.

Now a word about pinhole apertures and focal length.

Pinholes have a relative sharpness compared to one another when used at different focal lengths. This gets into a lot of math about the image circle created at a specific distance, how off axis light enters the pinhole to create blurriness, and so on. I didn't concern myself with all of this when I chose the specific apertures offered for PinBox

This is because it simply doesn't matter for our purposes. For example. The sharpest pinhole aperture for PinBox would be 231 microns. The closest aperture I offer to that is 250 microns. I found that 250 microns worked great. I also found that 150 microns was awesome too. So, my suggestions in the above video and down below are based on my observations and experiences when testing PinBox

One last note on this process, I also expect you to use the pinholes in many different creations. Although I could have chosen specific apertures for specific focal lengths, it would have been difficult to try and predict what you will do with PinBox sometime in the future. Instead, just pick a pinhole based on the following information. 

Choosing your PinBox pinhole.

  • 100 microns f/300 @ 30mm. Day. Esposures in Minutes
  • 150 microns f/200 @ 30mm. Day Esposures in 40 seconds +
  • 200 microns f/150 @ 30mm. General Purpose Exposures in 20 seconds +
  • 250 microns f/120 @ 30mm. General Purpose Exposures 8-20 seconds
  • 300 microns f/100 @ 30mm. Night Exposures in seconds to minutes
  • 600 microns f/50   @ 30mm. Night Exposures in Minutes to hours

The above information is simplified quite a bit and takes into account film reciprocity. 

Pro tip: Light Meter and Mr. Pinhole

I suggest using the "light meter" app by David Quiles (available for free or paid on the App Store and Google Play- Not Sponsored) for metering the scene. 

  • Open the app. Set your ISO, set the meter to "R", compose in the window, and read the result at f16. 
  • Then head over to http://www.mrpinhole.com/exposure.php .
  • Enter the f/stop for the PinBox aperture you chose (not f16). You will then see a chart of exposures. 
  • Look at the exposure for f/16 and then find the time the Light Meter app suggested for f16. 
  • Then look to the f/stop aperture you entered when accessing the chart. You will see the conversion and exposure time right away. This is how I do it.
LIght Meter App
LIght Meter App
Mr. PinHole Website
Mr. PinHole Website

WE DID IT! Now What? BackerKit Surveys and Shipping Timeline
over 5 years ago – Tue, Aug 07, 2018 at 04:12:21 PM

Hello Lovely People!

Thank you for Bringing Back the Box!

A few things need to happen before we can kick off production and fulfillment. Here's a quick rundown:  

  • First, Kickstarter needs to transfer over the funds so we have the money to make the rewards (this can take up to two-four weeks).  
  • Second, I have to send out backer surveys so you can make any necessary reward choices, verify shipping information, and choose any add-on's that you may like (like additional apertures, PinBox kits, wraps, etc.).  

I have partnered with BackerKit to streamline your surveys. BackerKit provides me with the tools necessary to give you the best fulfillment process possible. I'll send out a BackerKit survey to collect this information in about one week (around August 10th, 2018). Don't worry, I'll give you a heads-up before I send the survey so that you can watch for it. 

You don’t need to create a BackerKit account to answer your survey. The invitation email contains a link to your personal survey. It is important to submit your responses as quickly as you can since we need this information to process your rewards.  

Some important notes: If you need to change your survey responses, purchase add-on items, or update your shipping information, you can click the link in your survey email again or request your survey link under "Lost your survey?" on our BackerKit project page (This page will only start working after we send the surveys out).  

If you prefer, you can contact me directly and give me your information, but answering your survey helps me get your rewards out to you faster. BackerKit helps me save lots of time by streamlining the survey process, automating data organization, and providing us with pledge management software to make it easy to process your pledge reward shipments.  

If you used your Facebook credentials to log in to your Kickstarter account, the BackerKit survey link is sent to the email address you use for your Facebook account. If you have another email address that you prefer to use, please contact me.  

We are poised and ready to begin shipping at the end of August. The faster you complete the survey, the faster I can ship!

 You've been Great. Thank you all, and remember, #TheBoxIsBack!  

Cheers,  

Rob
Backer Update #1: Help Spread the Word
almost 6 years ago – Tue, Jul 31, 2018 at 11:11:53 PM

Hello Lovely People,

Only 3 days left for PinBox on Kickstarter. 

Please help me spread the news about PinBox.

Simply share PinBox everywhere you interact about photography. IT ALL HELPS. Post on DP review, share on your FB/Twitter/IG... you get the picture. 

Here's the short link: https://goo.gl/LXxNNF

Cheers,

Rob!